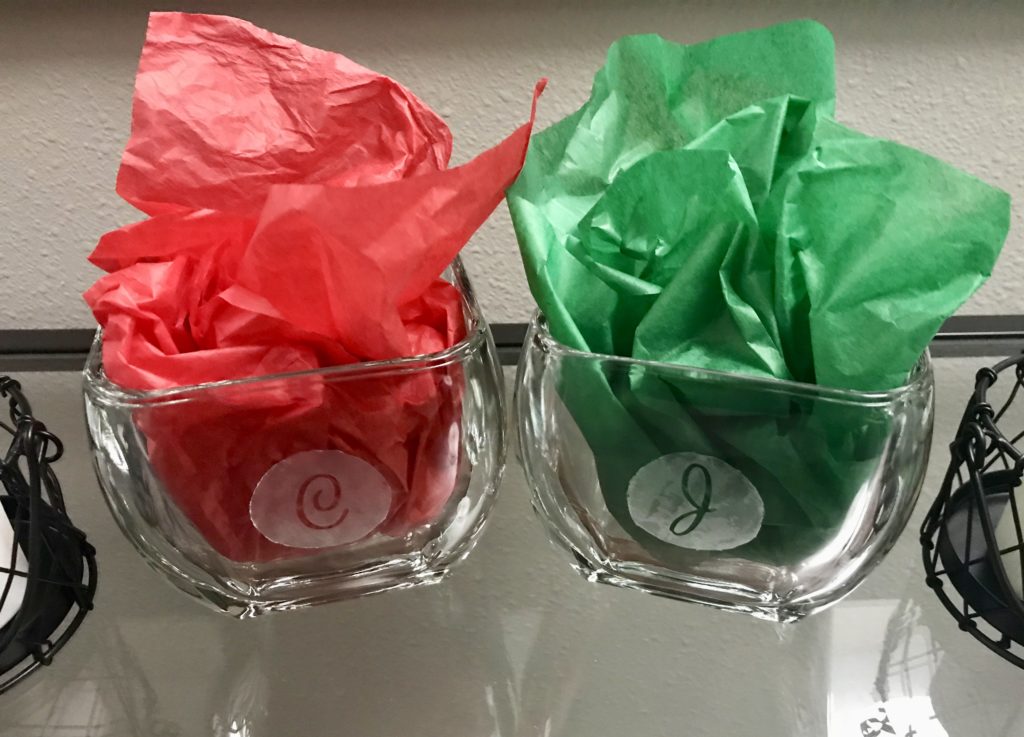
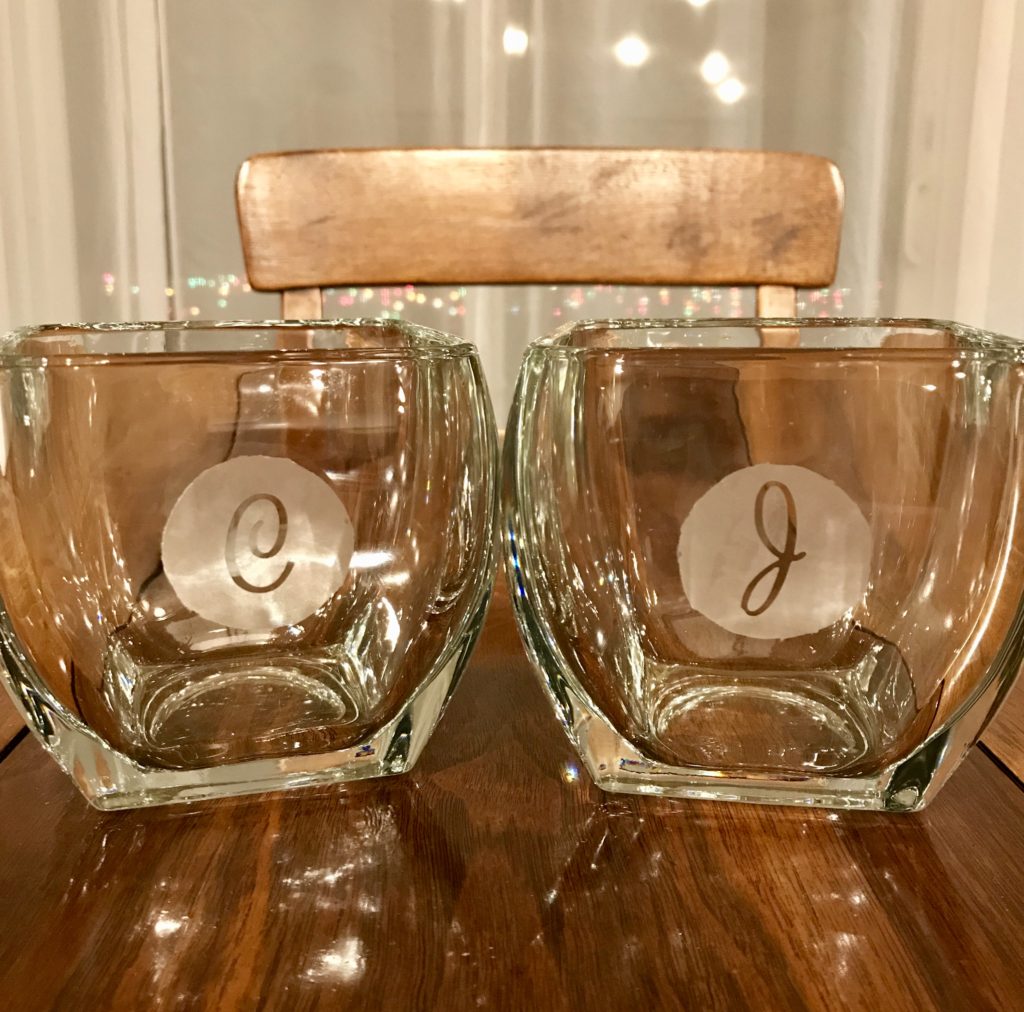
I’m a practical gift giver. I follow a list and almost always give what is on the list. So for non-list type situations, I struggle. Big time. But I also like being crafty, and that can make the most drab practical gifts incredibly cute and personable. There are two girls from my old department that I am still close with and we exchange gifts. I decide to do a little DIY glass etching as part of their gifts. If you’ve never done glass etching before, it is the fastest and easiest DIY ever. I swear.

In high school I took a crafts art class. In the class, we all got a 12 inch square mirror to etch. It took so long to cut out our designs on contact paper but I thought it was so cool. So cool that I etched wine glasses for my parent’s 25th wedding anniversary when I took the class again the following year. I remember driving to Bed Bath and Beyond on a school night and my 17 year old self purchasing wine glasses. That was probably the first time I was the most grateful to have my license. ?
Anyway, etching “February 6,1982” on not one, but TWO, wine glasses was challenging due to the curve. Challenging but not impossible. It just was a lot of little x-acto knife cuts. But once again, the project was a success!
Now, I bet you’re wondering why I first said it was the fastest and easiest DIY and then went on to say the stenciling took forever. Well, there is the time consuming way by making your own stencils, and then there is the easy way by using tape and stickers. Guess which one I used? ?
Because I didn’t want to mess with curves again, I found these awesome heavy square vases. I decided to personalize the gifts by putting the girls’ initials on the vases using letter stickers. Since the sticker would cover the glass, that meant the etching would go around it. So I needed a frame, if you will, around the letter. I took two strips of painters tape (to make it wider) and used a roll of utility tape (it happened to be the right size) to trace a circle. Next, I stuck that on the vase and used the x-acto knife to cut out the circle. Lastly, I placed the letter sticker in the middle of the circle and etched away!


Supplies
Glass you want to etch like a vase, mirror, glasses, etc.
Stickers, tape, etc.
Small paint brush (I used foam but an artists brush would work too for small areas)
X-acto knife
Directions
Make sure your glass is clean and well dried. Place stickers and tape on glass. Paint the glass etching cream on nice and thick. Wait 5 minutes. Wash the cream off. It helps to use your paint brush to sort of wipe it off. Remove stickers and tape. That’s it! Enjoy your glass etched masterpiece! ??
Some DIY Glass Etching Ideas
- Stripes! Place rows of tape around a vase or glass and etch in between to create stripes.
- Squares instead of circles. Since it was a little difficult to cut a perfect circle out with a knife, an easier option would be to make a square around the letter with strips of tape.
- Negative space. Instead of placing the sticker down and etching around it, use the border on the sticker sheet and etch the inside. This would be great for little shapes like hearts, stars… and horse shoes, clovers and blue moons, pots of gold and rainbows, and a red balloon! (Sorry, not sorry – I couldn’t resist ?) ❤️⭐️☘️???

These personalized etched pieces can totally stand as gifts on their own, but the practical part of me wanted to give a little with it. I will be filling the vases with fuzzy socks, fun colored pens, and some brownies cut out with Christmas cookie cutters to keep the festivity of the season.
Happy etching! ?
SaveSave
