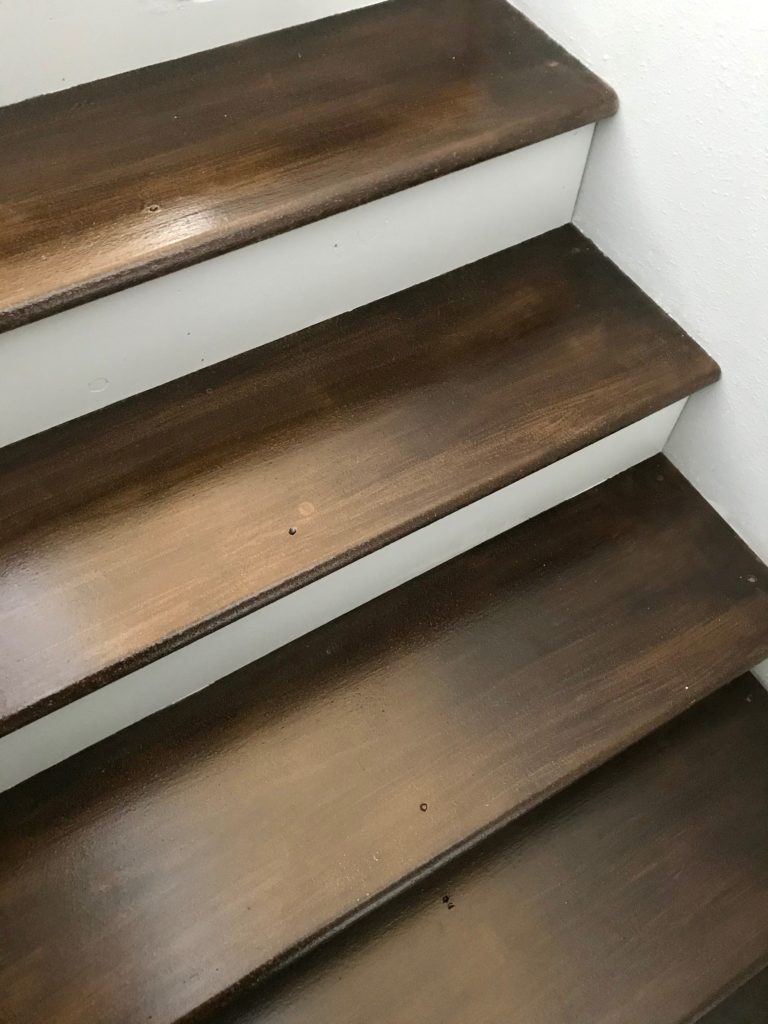
This has to be one of my most exciting projects to date! Our stairs to our basement have been unfinished, just like our basement has been. The problem was that our stairs have an open railing and are fully visible from our main floor. No matter how much our great room came together decor-wise, it always felt a little unfinished because of the stairs. A couple years ago I had the idea to try painting them to look like wood just as a temporary fix. Unfortunately, around that time was when my hip pain flared up so sitting on stairs to paint them was out of the question. But this year I am fully recovered and what better time to paint that during quarantine! Here is how I painted our stairs to look like wood.

One of my first blog posts was a stand for our TV so we could put our devices below it. I had tried to match our Ikea furniture’s “wood” grain with a dry brush and couple different shades of black and brown paint. I figured I could do something similar for our stairs. We now are making a lot more progress finishing our basement in an unconventional way (more on that later) and this temporary fix for the stairs might not be so temporary anymore. Either way, it was actually easier than I thought it would be and we are thrilled with how finished our great room now looks.

How to Paint Stairs to Look Like Wood
Our stair treads are the very inexpensive particle board treads often used on stairs that get carpeted. We gently sanded them and cleaned up any dust. I then taped off our walls and primed the treads and the risers.

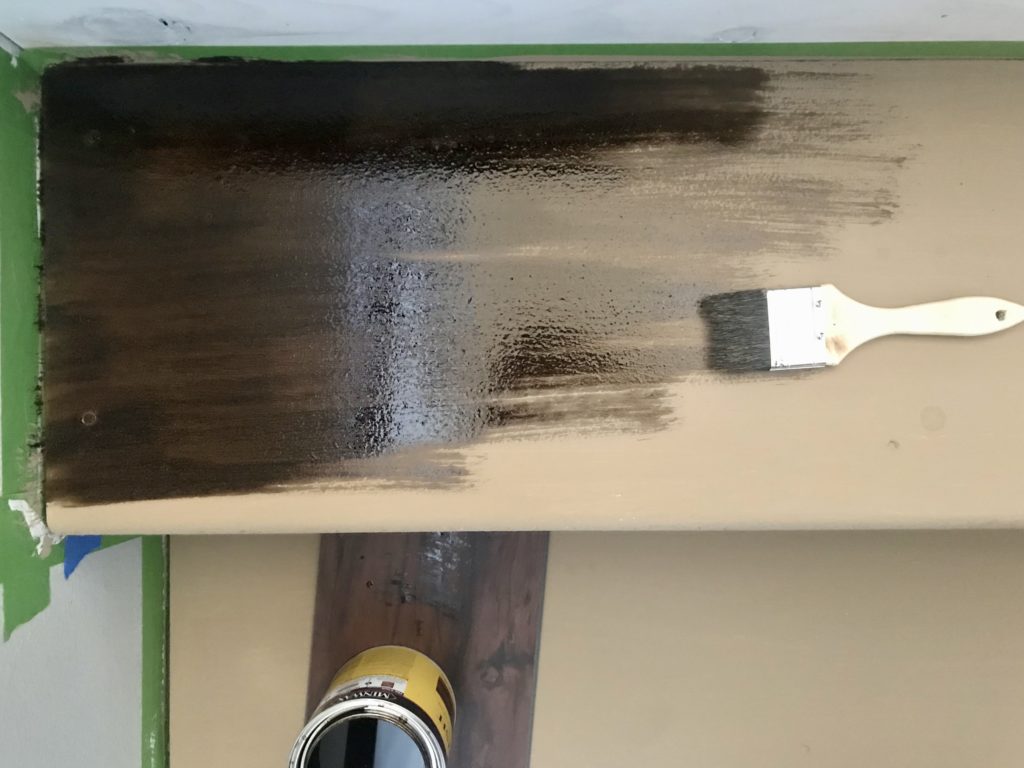
Once the primer was dry, I taped the risers to protect them from the faux wood “treatment.” I applied a coat of a very ugly tan paint to the treads. This color we tried to match to the lightest undertones of our vinyl plank wood flooring. You could also use a coral shade to give a warmer, cherry-like look. Even though I’m not a fan of tan colors, the steps still looked a lot better than the before!

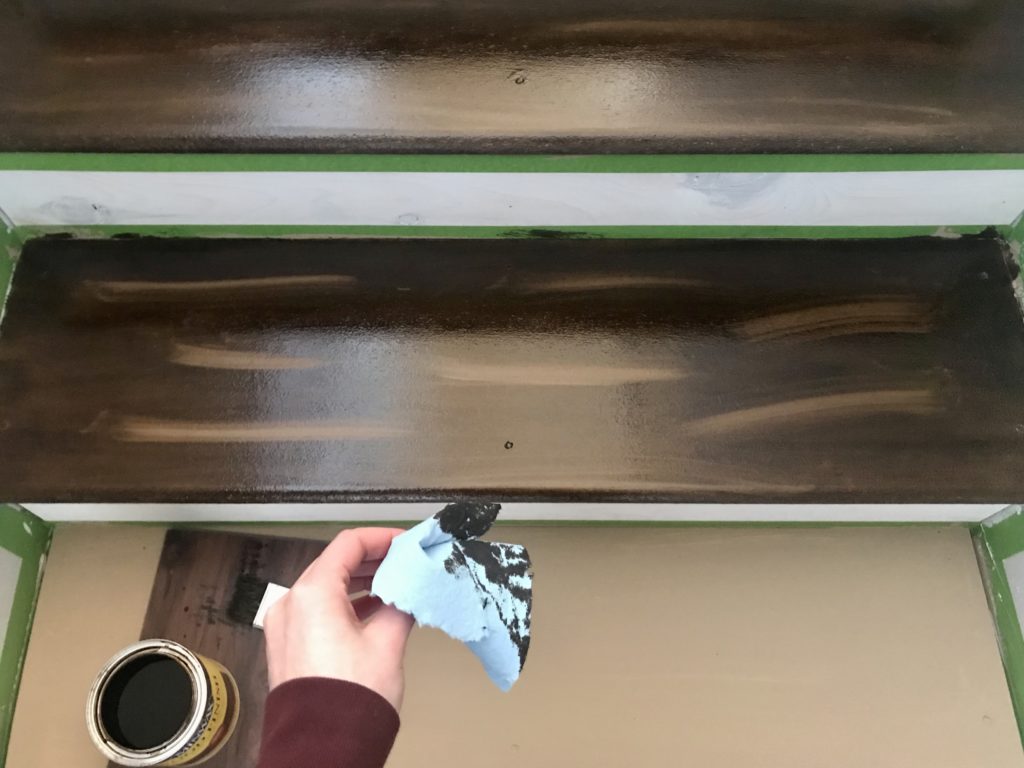
Next is the scary but easy part. Using a chip brush, I applied an espresso oil-based stain to the treads. The chip brush helps to keep the brush strokes visible which creates sort of that wood grain look. To give a little more definition, I went in with a shop towel and wiped some of the stain up. I then went back over those sections with the brush (do not add more stain) to blend it.


Because we applied oil-based stain on top of water-based paint, it took a long time to dry. Even after a couple days, some parts were still a bit tacky. Landon was nice enough to help clear coat the stairs. He definitely lost a pair of socks in the process but the first two clear coats really helped get rid of that tacky feel. We added two more clear coats for a total of four. That might be a bit much but we had enough to cover the steps so we figured we’d just use it up.
At this point we decided we wanted the risers to match our gray walls rather than paint them white, which is what we originally planned. I removed the tape on the risers and taped off the treads and gave the risers two coats of Sherwin Williams Mindful Gray.
The future of these stairs
The stairs are a bit slippery, just as real wood stairs are. We wear slippers around our house so it’s not a concern to us for now. However, we do plan to order these clear anti-slip strips in the future.

Most stairs also have some sort of trim where they meet the walls. I’m not a huge fan of the skirts that are often used. It just doesn’t seem like it would fit our house. I’d love to use trim along every riser and every tread. But as we are cutting trim for our basement, that is not a project I want to tackle anytime soon. You could say we are a bit trimmed-out. I think painting the risers the same color as the wall definitely helps make it cohesive without any trim. And honestly, it still is way better than it started as!

We did get a quote from a friend who has replaced stair treads with ones that are stained back in January. With labor and getting the wood from the Amish, the estimate was over two grand. Definitely cheaper than buying real wood treads from Home Depot but still not an expense we feel like paying anytime soon. I think we will keep the stairs as they are right now for many years to come!


Wow your steps look great!
I love those stairs!!!! They look outstanding!
This looks good in the pictures, but which products did you use and how long did you wait between applying all the different products? Also, are the stairs holding up? How did you deal with the fumes from the oil based stain?
What type of paint and primer did you use? Just curious since you used minwax stain as the main color.
Your stairs look great. I have to paint mine, we use to have carpet on them but we got rid of the carpet when we put wood floors in. My stairs have plaster stains on them. Even though I sanded them the stain is soaked in. I tried putting stain on them and I got spotted stairs. So here comes the paint. I’m going to use black porch paint, everyone keep your fingers crossed it turns out good. 🙂
O. M. G!!
I did this! I followed your steps and it looks AMAZING!!
Like you, our stairs can’t be hidden. They are the first thing you see when you walk in our house.
We are on a very tight budget, so replacing the stairs isn’t an option.
Thank you so so much for sharing such a beautiful and easy diy that has made all the difference!!
That’s wonderful! Three years later and ours are still going strong. So glad this helped you!