
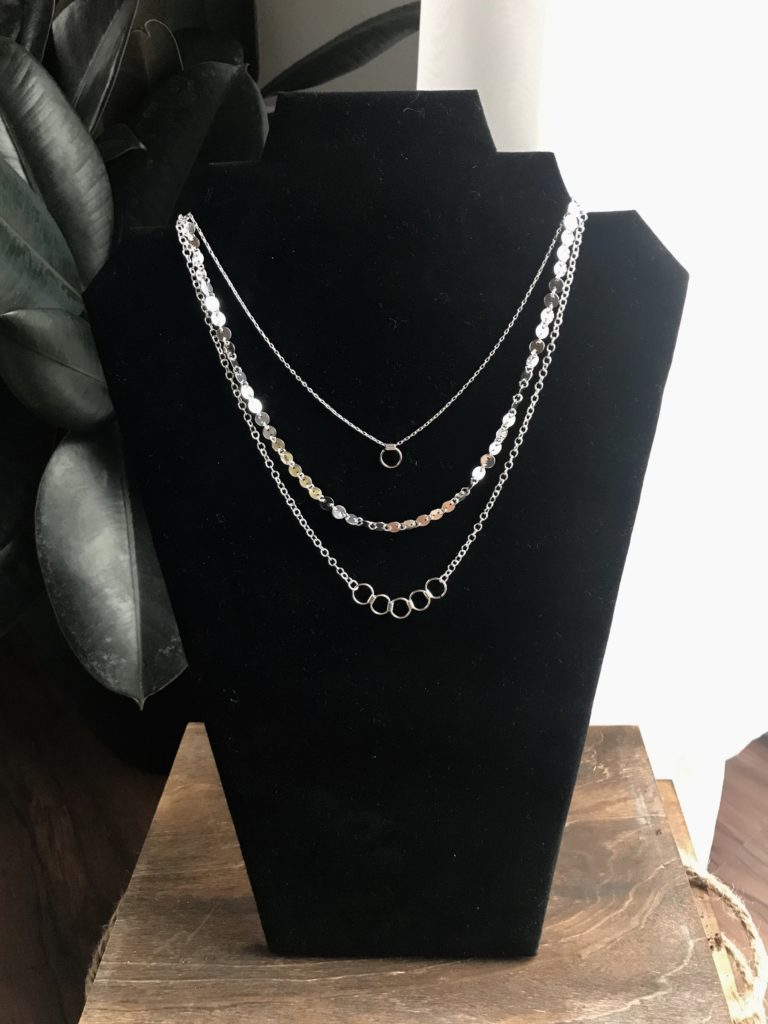
There are so many different things I want to cover in this post! First, a few months ago I was playing around with my jewelry making supplies and created a simple pattern using basic jewelry findings. Shortly after, a coworker had just purchased some necklaces to wear together for that new layered look trend. I then started thinking how I could take my jump ring pattern and create a look of layered necklaces with it. Here is how I made my own clasp so they don’t get tangled, as well as how I made the simple pattern.
How to keep multiple necklaces from tangling
Sure, Amazon and other companies have made clasps to keep multiple necklaces from getting tangled. But if you have a few simple jewelry making supplies, you can easily make your own for less. Below are two different clasps I found at Joann’s that achieve the same results. The left has an adjustable chain and the right is a nice minimalist slider one. I added a small jump ring to each loop on one side and attached a lobster clasp that way. The other loop remains to attach the necklace clasp too.

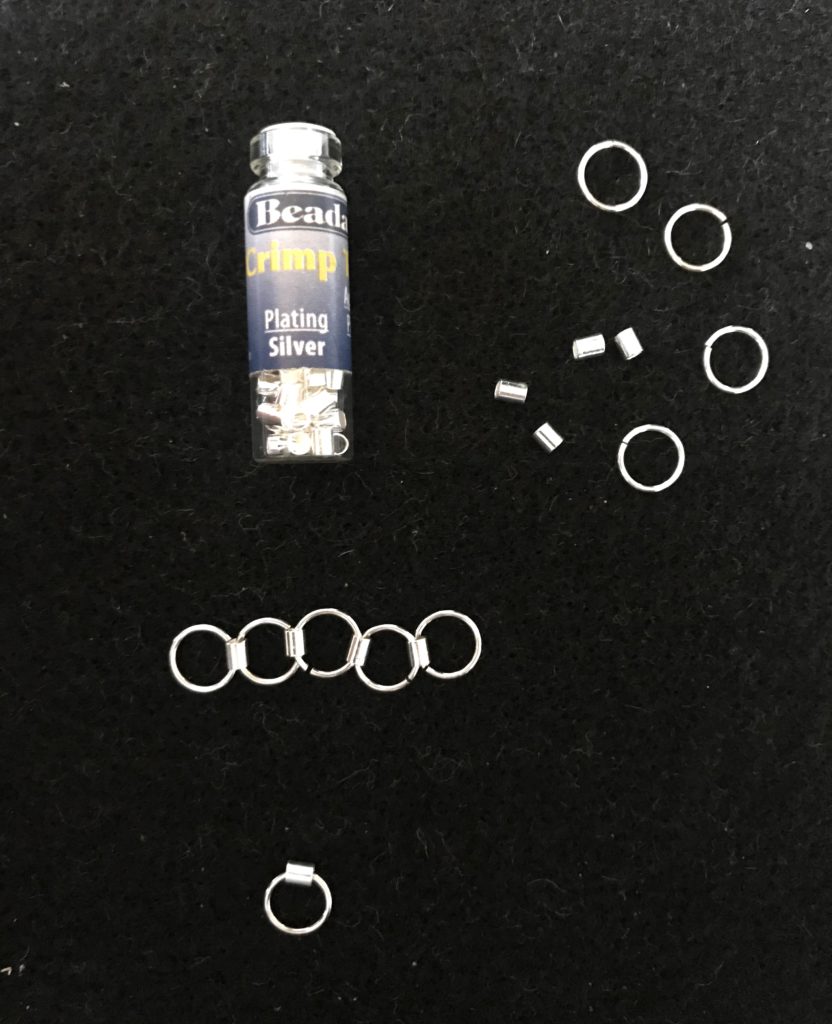
Simple jump ring pattern
This pattern is so simple, minimalistic, and uses jewelry findings in an unconventional way. It’s literally two items that you probably already have if you regularly make jewelry like me. Jump rings and crimp tubes! I used 8mm jump rings and 2mm crimp tubes. All you need to do is open each jump ring and thread it through the tubes, repeating as many times as you like. I did four tubes and five jump rings for my longest necklace.
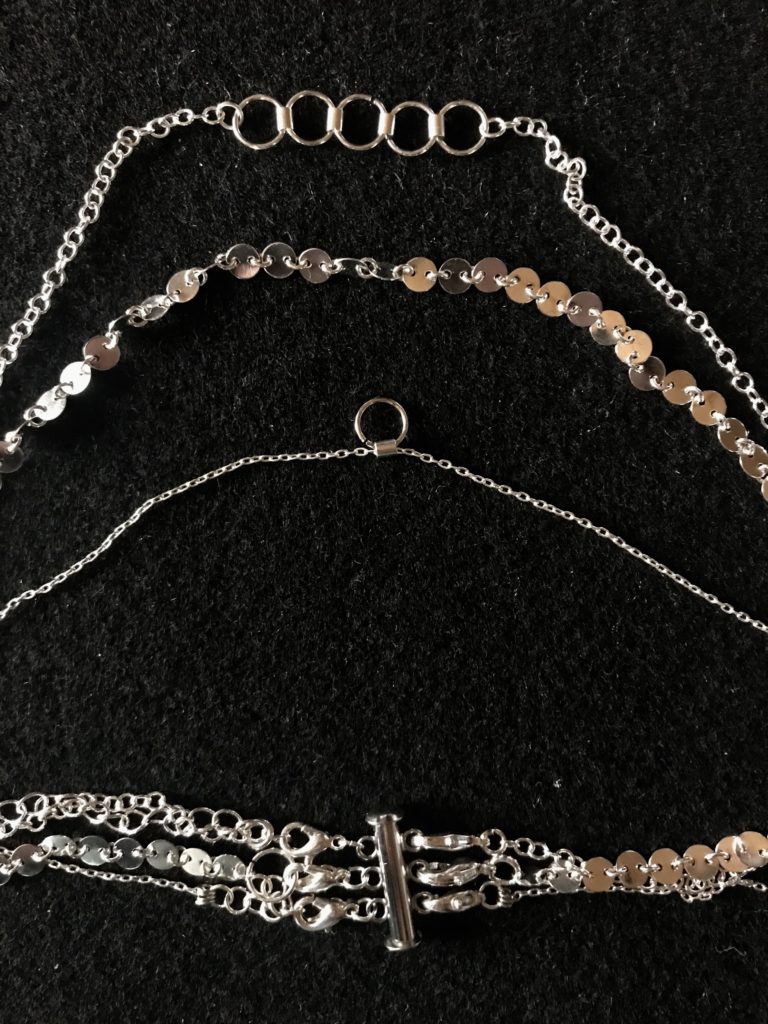
I used 2mm jump rings to attach it to a chain. Much like I did for the beaded bar necklace I made awhile back, I cut a chain necklace into two. To estimate the length, I added a jump ring in the middle of one side to try on before cutting the final length. The picture below shows the tail before I cut it.

For the shortest necklace, I wanted just one simple jump ring to sit right at the base of my neck. I used the tube to thread it onto a very thin chain. The chain was so thin, I couldn’t get a jump ring attached to it to create the clasp. Instead, I used wire and wrapped it a few times to create a thick jump ring. Then I was able to attach jump rings and a clasp to the ones I created.

I wanted the option to have three necklaces together and was stumped on what to do for the middle piece. I found a neat chain from Michael’s (that unfortunately is not online) and shortened it to the length I wanted. That was the easiest necklace!

At the last minute, I decided to make some jump ring and crimp tube earrings to match. I think I’ll try a bracelet in the same pattern too.
Putting it all together
All that was left was to attach each one to the tangle-free clasp. I love that I can separate them to wear individually too. Or I can simply remove one of them for two layered necklaces. Not quite endless possibilities, but quite a few for an easy DIY afternoon!
Love your post! Such a great idea for layering necklaces.