
It seems like forever ago when we got our mantle hung up above our fireplace. In that post’s pictures, we had a tile square sample that someday we would tile the fireplace with. And that someday has arrived! ?? It only took a few hours of our Saturday to tile the fireplace but it really makes the room feel so much more complete. Seriously. Looking at the before pictures makes me wonder how I lived with it that way for so long!

We were lucky enough to borrow a wet saw from a friend and get Landon’s dad to help us tile. None of us had any tiling experience whatsoever. Thanks to some YouTube videos, Landon felt confident to use the wet saw and how we should approach the tiling. And three heads really are better than one because together we got the spacing math just right so we didn’t have to cut the tiny tiles in half horizontally.

Somewhere during the construction of our home, the fireplace measurements got a bit off. It never really sat all the way back and flush with the wall. I think that actually became our benefit with the tiles because then the tiles aren’t sitting so far out. Originally we thought this would be a problem because of this funny hollow spot above. The temporary solution was a black piece of something heat resistant. I don’t have a picture of that but it really didn’t look bad with it in. Obviously the tile looks way better though. ?

The tile we chose is from Home Depot (you can check it out here). Since it is uneven, I was a bit concerned the obtuse corners would look jagged even if we cut it perfectly straight. Luckily, the home improvement world thinks of everything and there are literally tons of trims to choose from. I chose an aluminum one to coordinate with the chrome in the tile.

We used the mastic to adhere the trim to the wall first, and then measured the space between that and the fireplace edge. I made sure to measure at multiple sections on BOTH sides in case things weren’t even. Did you know the left side is 3/16 of an inch wider than the right? Well, now you do. Such great information I provide on this blog. ?

Once we had the measurements for the sides, the boys started cutting. We then slathered on mastic and worked our way up the wall. You’ll see the cardboard spacers at the bottom. They were used to not only make a level row when we got even with the top of the fireplace but also so we didn’t need to cut the tiles horizontally to reach the bottom of the mantle.

Oh and that hollow spot above the fireplace? We just adhered the tile squares really well to the wall above it. It surprisingly feels solid and I’m glad we didn’t have to figure out a filler for it.
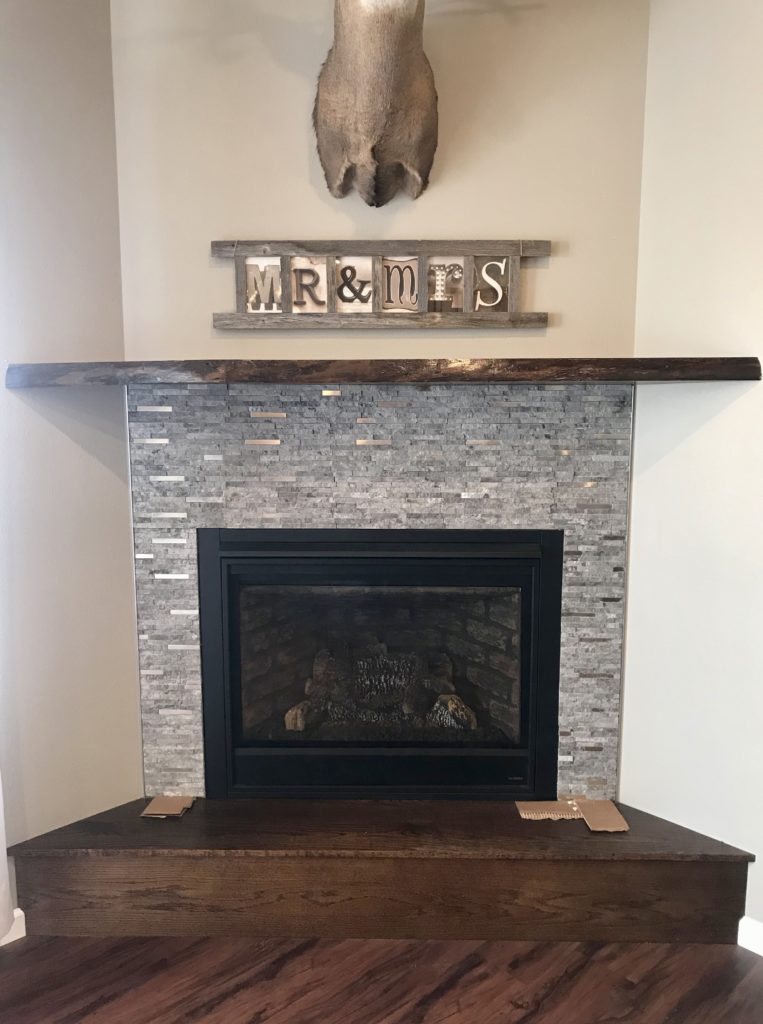
I absolutely love it! It catches my eye every time I walk into the room and I can’t help but smile. I’m especially proud how well the whole project went for us. We didn’t have any mistakes when sticking to the wall or bad cuts made. And it all went really smoothly too.
I’ll just leave you with a bunch of gorgeous pictures of the tile fireplace. Enjoy! ?


SaveSave
I love your fireplace!!!