
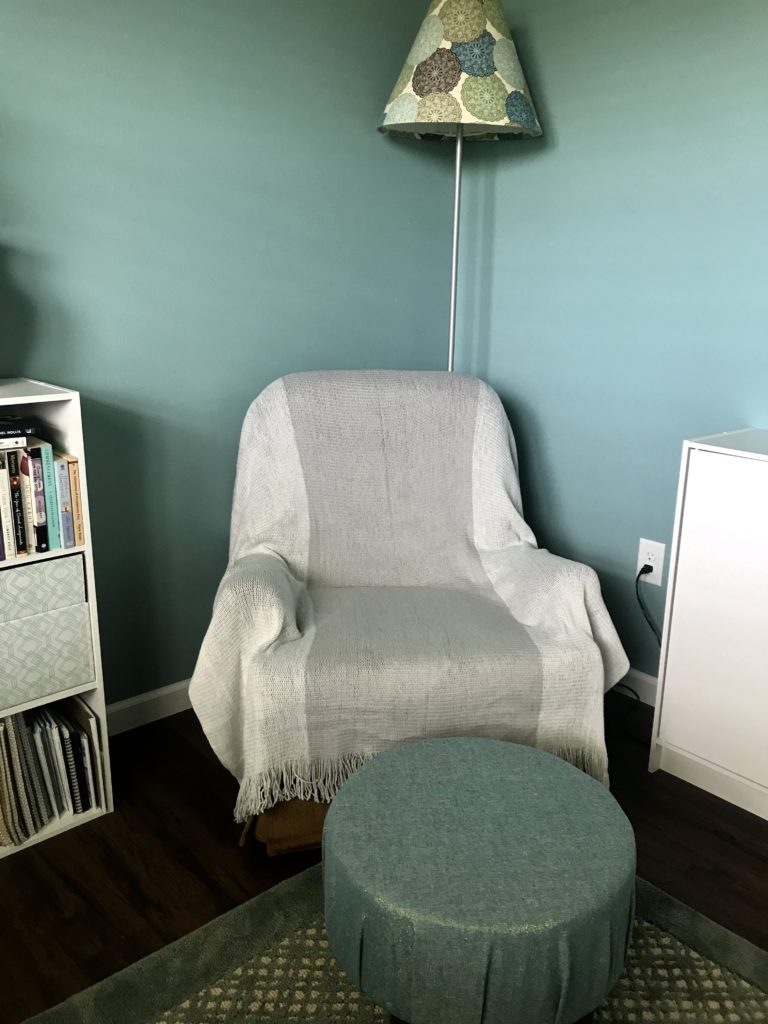
I love when the opportunity comes up to make something that I can’t find in stores. This is exactly what happened when I decided I wanted an ottoman for a reading nook in my office. I had an old chair that rocked and swiveled and didn’t look like a nursery chair. But it’s old, like 30+ years old, and that made it short. Any cute ottoman found at Target or Home Goods would have my knees higher than my chest and that just seemed a tad uncomfortable. I’ve always looked longingly at the different furniture legs at Home Depot and I knew just the project I’d use them for; my own DIY ottoman.

This project is really pretty simple. It does require a drill and a staple gun but it comes together pretty effortlessly. And I wish I had made it years ago when I was first out of college and originally had the idea! My ottoman is 13 inches tall which works perfect for my chair. Most ottomans seem to be around 17 inches tall. Different legs or foam cushions could change the height of the ottoman depending on your needs.

Supplies
4 top plates for mounting the legs
1 18 inch diameter round wood board
1 18 inch diameter tuffet foam
About 1 yard of fabric (I used Kaufman Essex Yarn Dyed Metallic Linen Blend Emerald Fabric)
Paint or stain for the legs
Drill
Staple gun
Instructions
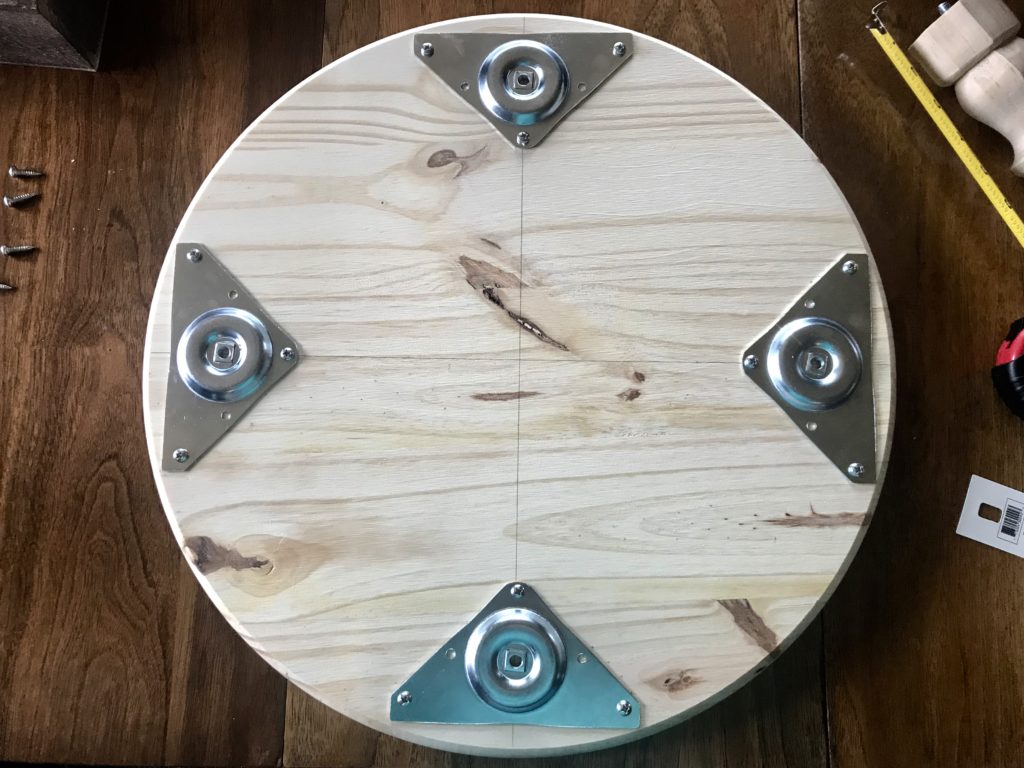
The first two steps can be done in either order. I was anxious to see it put together so we assembled the top plates to the round board and attached the legs before staining. Either way should work though! To attach the top plates, draw two lines intersecting at the bottom of the round board to make sure the legs are spaced evenly. Then drill the top plates into place. Next, screw the legs in. Viola! A cute little plant stand (that I failed to take a picture of apparently). 🙃
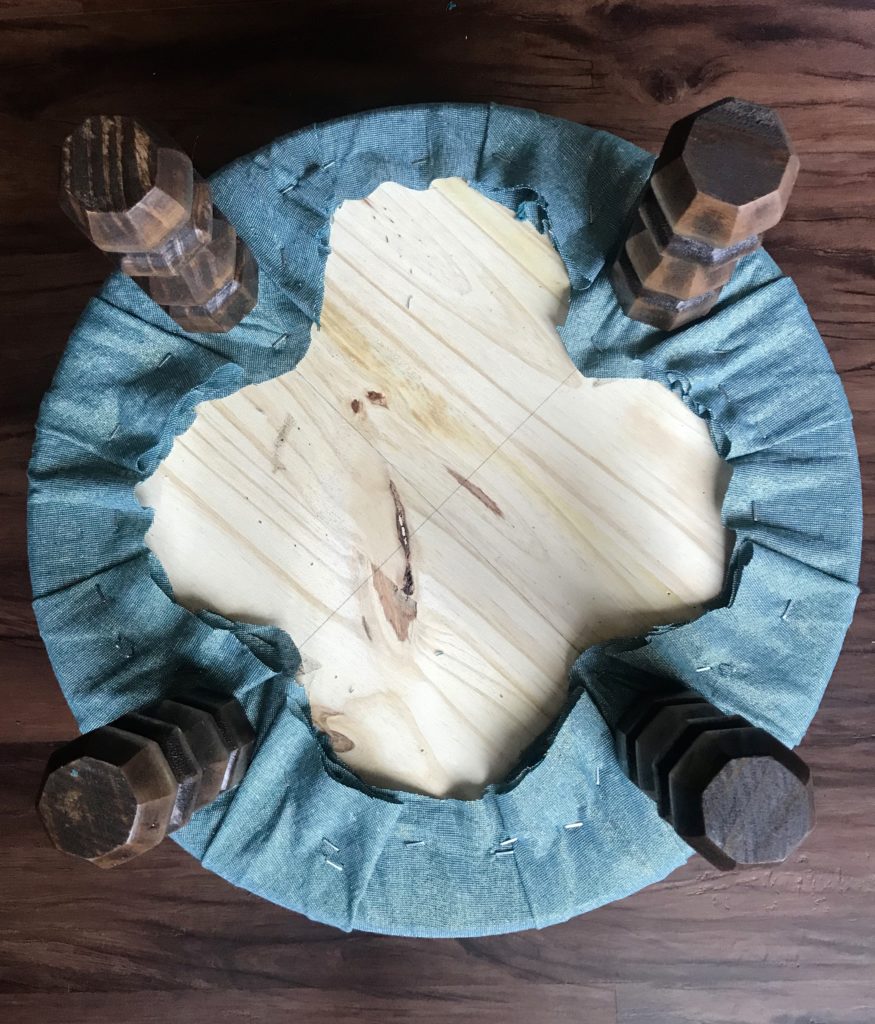
While the paint or stain is drying, it’s a good time to wash (if need be) and iron out your fabric. After everything is dry and wrinkle free, place the fabric down on a large flat surface (like the floor). Place the tuffet foam on top of that, followed by the ottoman upside down.

Starting with the markings you first made for the legs, staple one side of the fabric down. Staple the opposite side next. It helps to have someone hold the fabric and someone else staple. The order can best be described as if looking at a clock: 12, 6, 3, 9.

After the first four staples were in, I used push pins to see how I wanted the pleats to look. I tried two different ways. Once I determined the one I liked best, we stapled four more spots: in between 4 and 5, 10 and 11, 1 and 2, 7 and 8. These ended up going over the top plates.

The rest of the stapling then just went in a circle. I pulled the fabric between two staples and pleated it to my liking. I held it taunt and Landon stapled it into place. It went rather quickly and I was even impressed how well it turned out.
When the pleats are all in place, trim the excess fabric and throw a few more staples down for good measure. I felt for the screw holes of the plates, and snipped a hole in the fabric. Last part was screwing the legs back on!

In conclusion, I now want to make DIY ottomans as gifts for everyone we know. I had so much fun looking for the perfect fabric and it went together so smoothly! All that’s left is to put my feet up and read!
Hmmmmm, I wonder what color ottoman I need!?