Pillow Covers from a Curtain Panel

Pillow Covers from a curtain panel

In the spring of 2015, Landon and were in the middle of planning our wedding.  Construction was just starting on our house.  We were both driving an hour one way to work (although Landon would soon be off for the summer).  Landon’s brother and his wife had recently bought a house two miles from where we were building and half the distance to my job.  They were heading out of the country for a two month honeymoon and we graciously agreed to house sit.  I was able to save an hour every day commuting and Landon was so close to general our house.

We decided we would buy a new bed and have it moved into one of their empty bedrooms for those two months, and then it would be a short move into our house once it was completed.  So off we went, mattress shopping.  But before we bought a bed, we purchased our leather sectional for some ridiculously low price.  And we kept that in baby wrapped up in plastic in his grandpa’s garage for months before we ever got to sit on it.  It was a great find and I was so excited.  Except I was actually disappointed to find out it came with the pillows that were displayed on the floor model.

Pillows that came with couch
Pillows that came with couch ?

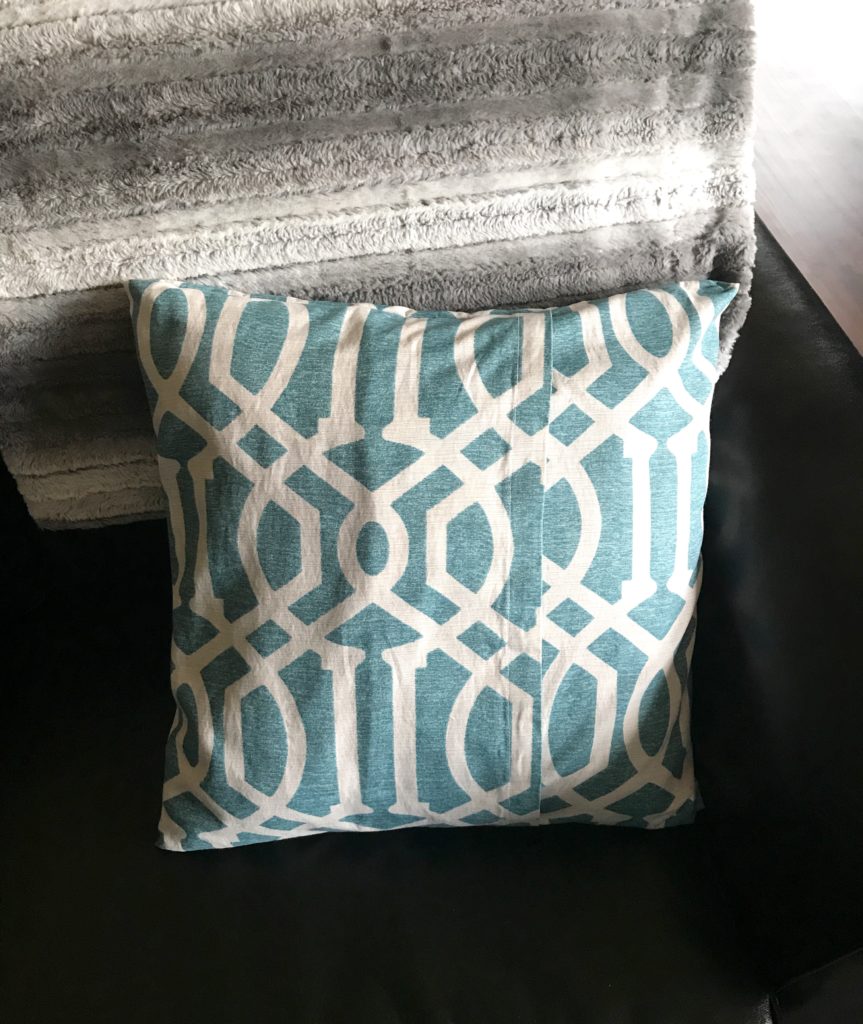
I hated those pillows.  They really aren’t that bad looking but they are so not my style.  And if you have ever had couch pillows that can’t be washed, you aren’t too keen when people lay on them regardless if they are sick or healthy.  The obvious solution was pillow covers.  So I looked on and off the first six months or so but didn’t find anything I liked in the right size.

Our great room "before" the pillow covers
Our great room before the pillow covers

Last summer I was ordering curtains for our guest room from Target and they had a major sale going on.  I thought to myself,  “Hey!  Curtains are made of durable fabric that can be used as pillows!”  And since our ottoman is Threshold, I figured the same brand of curtain would coordinate.  By adding that curtain to my cart I saved $10 and the curtain was $15.  Making the total $5  for the fabric to make pillow covers.  And when they arrived, we hung up the guest room curtains and this curtain, well, it went to hide in the ottoman for nearly a year.  And I spent an hour making pillow covers last week.  Some things just can’t be rushed, okay?

sewing pillow covers

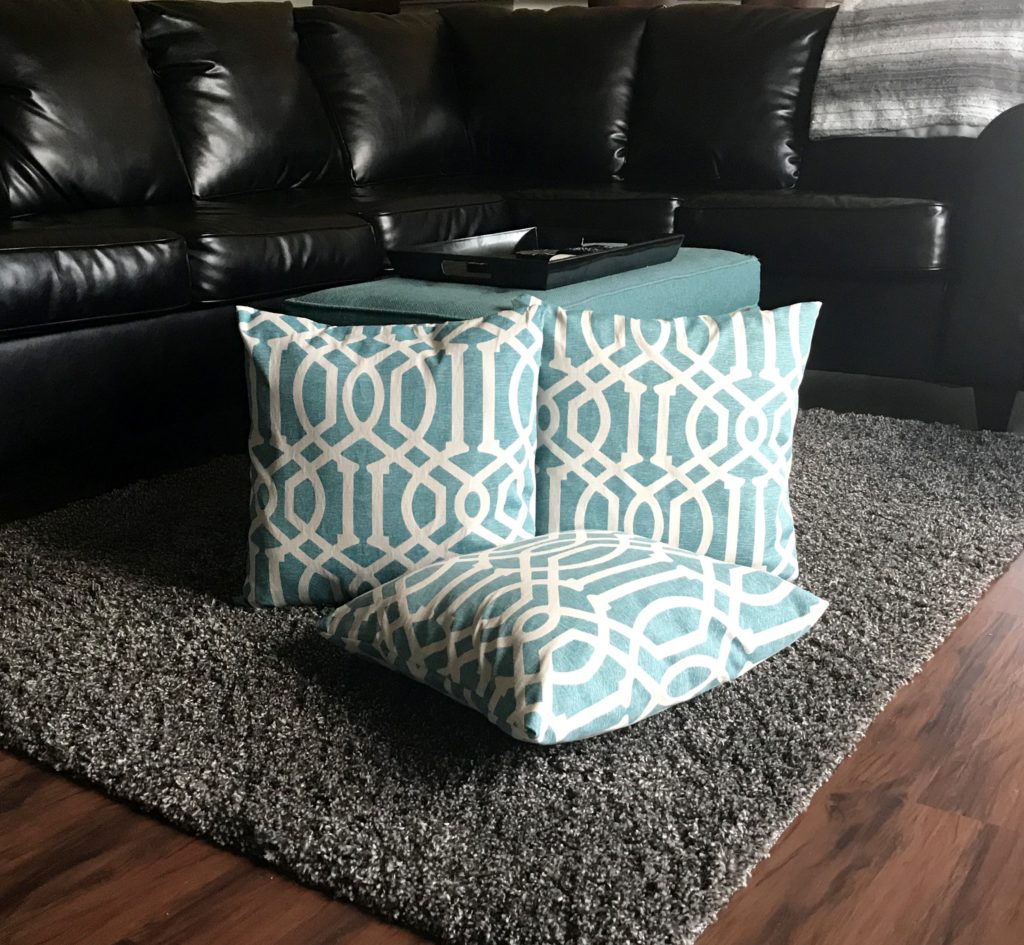
And here are the pillows now!  They are teal and I basically love them.  Plus I can wash them whenever I want.  (No Landon, this is not a free pass to eat in the living room. ?)

Our great room "after" the pillow covers
Our great room after the pillow covers – so much better!

I even kept the finished edge of the curtain to be the finished edge of the cover.  This saved me time not having to finish edges.  It was also a really good thing because the tension on my machine seems to be a little off and I wouldn’t have been able to get the seams to look so nice.  (Note to self, fix tension!)

Finished edge from curtain

I love how all these little projects just keep making our house a little more homier and a little more “ours.”

Pillow Covers

Homemade Eyeliner DIY

Homemade eyeliner

About 3 years ago I made the successful switch from pencil to liquid eyeliner.  I had tried different liquid eyeliners before, but they all irritated my eyes.  When I finally found two brands that didn’t hurt, I was pretty happy.  Since then, I have made changes to remove unnecessary chemicals out of our lives and after making my own makeup remover, I felt my actual makeup was next. Continue reading “Homemade Eyeliner DIY”

DIY Mirror

DIY Mirror
DIY Mirror
This post should really have a second title:  “How to get Your Husband to Not Like Menards”
hallway table
Hallway table

We’ve had this table in our hallway for the past year and a half and I love it.  But I have never really known what to hang above it.  A few months ago I decided a nice big mirror would really anchor it down and help fill a very long boring wall.  There was just one little problem.  Giant mirrors are expensive and I have a lot of walls to fill with things.  So a DIY mirror was the way to go.

CB2 mirror
Source

Back in March I was browsing CB2 and fell in love with the many pieces of this mirror.  The store had displayed 4 of them together and it was grand and eye-catching.  One wasn’t big enough for me but 4 was much to large (not to mention the price tag for multiples).  I then saw some people on Pinterest made large mirrors using many mirrors from the dollar store.  The lightbulb went off! ?

I headed to our dollar store and bought 9 mirrors all 11×14 inches.  At our local hardware store I had them cut a sheet of 1/4″ plywood to 36X45 (we planned on a 1.5 inch border around the perimeter for framing).  I started to take the mirrors out of the frames while Landon screwed in two brackets to one side of the wood and added anchors to the wall.

Frames bent back easily to remove mirrors
Frames bent back easily to remove mirrors [and yes, that’s our ceiling and light over our kitchen table :)]
After all that, we hung the wood on the wall and called it a night.  We left it there for a few days, making jokes about what the artist meant and saying we could stare at the “art” for hours.  What can I say?  We lead exciting lives. ?

Wood hung on wall
The wood has a soothing natural look, no?

After all that fun, we got back to work gluing the mirrors to the wood.  Landon used some heavy duty caulk that was leftover from some house thing or another (Locktite PL Premium Polyurethane Construction Adhesive).  I had marked sections on the wood to place the center mirror down first.  We then worked our way around that mirror gluing all 9 down.  Then we called it a night and left it on a card table in our great room for about a week.

Gluing the mirrors down

We then had a “pretty nice little Saturday” (get the Old School quote?) running errands.  Remember when I said this post could also be called “How to get Your Husband to Not Like Menards”?  Well we went to Menards to pick out trim to frame the mirror.  And I probably spent a good 30 minutes trying to make up my mind.  Sure they had lots of options but nothing was just right for me.  Poor Landon was going insane following me down the same 3 aisles!  He’s a saint. ?  Anyway, I finally decided to go simple and got plain flat trim, some simple corner pieces, and black paint.

The trim
The trim

Landon cut the trim and after painting the trim and corner pieces black, we used more of that heavy duty caulk to secure it to the wood border around the mirrors.  Then all that was left was to hang it up once it was dry!

DIY mirror
The finished project!
DIY mirror
And from the other angle

The mirrors are not perfect and I suspect with time they will take on a more fun-house effect but I love it!  It really wouldn’t take long to do this project in an afternoon and it was so easy!  Plus, a project you get to work on with your husband equally is fun too. ?

DIY Makeup Remover

I have sensitive skin.  It is both a curse and a blessing.  Well, maybe the only blessing is I have an excuse when the weirdos at the mall try to get me to look at the overpriced skin care they are selling.  I suppose normal people could just lie and say they have sensitive skin…  Moving on!  The area under my eyes seems to take the brunt of my sensitivity.  I have had 3 different steroid creams prescribed to me in the past decade.  It is not fun to have pain under your eye every night you wash your makeup off.  I also have dry skin.  Cleansers dry it out too much and even sensitive makeup remover towelettes feel like a thousand tiny needles are poking me.  I finally found a brand that doesn’t hurt AND removes my eye makeup but it’s about $10 a month and is sold nowhere in my town.  Using Prime costs even more.

Enter, my own DIY makeup remover, sensitive skin friendly and so, so, so cheap and easy to make!  You can make a big batch to last a month or a little batch to last a week.  The best part is that the ingredients are all good for your skin.  And the other best part is that you don’t have to scrub your eyes like crazy to get off mascara.  Just a few gentle wipes and it’s gone!

DIY Makeup Remover
DIY Makeup Remover

Continue reading “DIY Makeup Remover”

Bathroom Wall Art

BathroomRemember last week when I talked about my new ideas with printables?  Well in the midst of working on that bar art, I started making some for our bathroom.  Our bathroom has some large chunks of wall space that just seemed so bare.  The one that bugged me the most was the space above the toilet.  So I used my new printable creating skills and made some bathroom wall art.

Now, I haven’t been blogging that long but if you had told me when a few months ago that I would later be taking pictures of the space our toilet occupies, I would have thought you were crazy.  Seriously, I felt like one of those girls taking selfies in the bathroom mirror.  I’m not sure which is worse though. ?

Bathroom wall art

Since the wall behind our toilet is fairly narrow but tall with our 9 foot ceilings, I felt a long a narrow piece would fill the space well.  I haven’t seen any (then again, I’ve never really looked at bathroom decor at Hobby Lobby) but making printables really became a game changer.  I love silhouette art and decided to go that route with objects commonly found in bathrooms split among three frames.

In the beginning, I thought about toothbrushes, toothpaste, shower things, etc.  I couldn’t get that to look right – it seemed more suited for a kid’s bathroom.  I spent all of 2 minutes on the bobby pins and then decided to go more feminine with hair and makeup silhouettes.  Landon doesn’t seem to mind that it’s not objects he uses.  He even helped me decide on the order to hang them.  ?

Bathroom wall art

The frames are from the dollar store and I love how the silver is shiny like our shower curtain.  I’m not sure if I’ll do more art in this room in the future.  We have a super tiny window that needs a proper curtain so maybe when that is complete I’ll have more direction for adding more bathroom wall art.

I am in the midst of so many DIY projects for our house and sometimes they take longer than planned.  Plus, you have to make time to live a little! ?  I had made the bathroom wall art printables weeks ago and also had purchased the frames around the same time.  It’s nice to take a break from big projects and do a small quick one.  Finishing something is a great feeling!

Our Bar at the End of the Kitchen

Both Landon and I grew up in homes where there was rarely alcohol.  I honestly don’t ever remember seeing my mother drink.  We laugh now because whenever we are at either of our parents’ homes, they are asking us if we want a drink before we even get our shoes off.  My how things change!  To take after their present day hosting antics,  we took it a step further and made a home bar – complete with an oh-so-trendy gallery wall.

Home bar

It’s kind of astounding that we even need a bar when we have a wine rack built into our cabinets (and beer should be refrigerated).  But there is a season for liquor (mine is usually allergy season because I don’t need more histamines from wine making breathing difficult) and we have all these fancy glasses.  The Mr & Mrs wine glasses were a shower gift.  The Yours, Mine, and Ours glasses and decanter,  a wedding gift.  We also have our glasses from when we went on the brewstillery tour in Nashville.  The iridescent goblet-like glasses and pitcher were my grandma’s and have a matching chip and dip bowl.  We have a dozen more wine glasses in the cupboard (you know, for everyday use).  I suppose we are missing martini glasses but honestly, I’d rather go to our local wine bar for a martini than try to make one.  (Yes, you read that right, our wine bar makes martinis.)

Yours, Mine, & Ours set. Mr & Mrs wine glasses.
Glasses from the brewstillery
Glasses from the brewstillery.

A tray is a bar cart necessity

When I searched Pinterest for bar cart ideas, they always seemed to have a tray to anchor the bottles on top.  I have this lovely silver one from my grandma (not the same grandma I got the goblets from) and thought it added enough vintage charm to make our drinks feel exceptionally classy.  I have doubts that this grandmother of mine has ever really had a drink but hopefully she doesn’t mind us using her tray for our own speakeasy.

The best part of putting all this together was making the wall art.  I shared a sneak peek a couple weeks ago about the cork sphere.  It used all the corks we had (we are more Bota Box type people).  Side note – Amazon sells wine corks!

The printables were the most fun.  They actually came together really fast, which is unusual for my perfectionist self.  I already had all the frames from half a dozen apartments ago but never got around to using them before.  I spray painted all of them black and then started putting holes in our walls to hang them.

Bar art gallery wall
Gallery wall/Printables

These printables have definitely opened me up to so many other ideas for our house.  At one point I had a bunch half done and open on my computer.  Every time I’d start one I’d get an idea for another and have to start that before I forgot what it was.  We’ll see where else our walls get affected in the coming months.  Now if you’ll excuse me, I have a mint plant that is begging to be made into a mojito at The Bar.

The Bar sign