Our Bar at the End of the Kitchen

Both Landon and I grew up in homes where there was rarely alcohol.  I honestly don’t ever remember seeing my mother drink.  We laugh now because whenever we are at either of our parents’ homes, they are asking us if we want a drink before we even get our shoes off.  My how things change!  To take after their present day hosting antics,  we took it a step further and made a home bar – complete with an oh-so-trendy gallery wall.

Home bar

It’s kind of astounding that we even need a bar when we have a wine rack built into our cabinets (and beer should be refrigerated).  But there is a season for liquor (mine is usually allergy season because I don’t need more histamines from wine making breathing difficult) and we have all these fancy glasses.  The Mr & Mrs wine glasses were a shower gift.  The Yours, Mine, and Ours glasses and decanter,  a wedding gift.  We also have our glasses from when we went on the brewstillery tour in Nashville.  The iridescent goblet-like glasses and pitcher were my grandma’s and have a matching chip and dip bowl.  We have a dozen more wine glasses in the cupboard (you know, for everyday use).  I suppose we are missing martini glasses but honestly, I’d rather go to our local wine bar for a martini than try to make one.  (Yes, you read that right, our wine bar makes martinis.)

Yours, Mine, & Ours set. Mr & Mrs wine glasses.
Glasses from the brewstillery
Glasses from the brewstillery.

A tray is a bar cart necessity

When I searched Pinterest for bar cart ideas, they always seemed to have a tray to anchor the bottles on top.  I have this lovely silver one from my grandma (not the same grandma I got the goblets from) and thought it added enough vintage charm to make our drinks feel exceptionally classy.  I have doubts that this grandmother of mine has ever really had a drink but hopefully she doesn’t mind us using her tray for our own speakeasy.

The best part of putting all this together was making the wall art.  I shared a sneak peek a couple weeks ago about the cork sphere.  It used all the corks we had (we are more Bota Box type people).  Side note – Amazon sells wine corks!

The printables were the most fun.  They actually came together really fast, which is unusual for my perfectionist self.  I already had all the frames from half a dozen apartments ago but never got around to using them before.  I spray painted all of them black and then started putting holes in our walls to hang them.

Bar art gallery wall
Gallery wall/Printables

These printables have definitely opened me up to so many other ideas for our house.  At one point I had a bunch half done and open on my computer.  Every time I’d start one I’d get an idea for another and have to start that before I forgot what it was.  We’ll see where else our walls get affected in the coming months.  Now if you’ll excuse me, I have a mint plant that is begging to be made into a mojito at The Bar.

The Bar sign

Mercury Glass Coasters DIY

mercury glass coasters

Coasters.  They are the sacred barriers between beverages and ring-free furniture.  The first nice coasters I ever bought were from Pier 1 in college and we still use them, but they were only a set of four.  Sometime last year, my mother-in-law had coasters she had never used.  They were the kind you can put little pictures in.  I am not a fan of putting a sweaty glass of water on anyone’s face (even if the picture is under glass) but I knew I would need more than the four coasters I already had and that I could figure out how to give them a makeover.

before photo of coasters
This is what they looked like before.

I’ve been on a mercury glass kick lately and naturally I checked Pinterest to see if it was something that could be created via DIY.  Turns out it can be and it was so, so easy.  It also turns out that the coasters are perfect companions to the two most important beverages: coffee and wine. ?

Supplies needed:

  • Glass coasters (or tiles would work but they must be clear)
  • X-acto knife
  • Ball point pen
  • Glass cleaner
  • Distilled vinegar
  • Krylov Looking Glass spray paint
  • Paper towels
  • Vinyl bumpers

Directions:

I first used the X-acto knife to remove the vinyl bumpers.  Next, I tore off the little plastic picture holders.

Remove vinyl bumpers
Then remove photo pocket

After that, prepare to spend a lot of time scraping off the white paint on the back that makes the foggy frame for the photos.  I switched back and forth between the X-acto knife and the ball point pen for this.  I was afraid of scratching the glass too much with the knife but found if I held the pen at an angle the edge around the ball point worked just as well without the risk of scratches.  It took a long time to do all four coasters and it got rather dusty but it was in some ways soothing.  I kind of compare it to those mini sand boxes that sit on desks and the rake is smaller than a normal table fork.  My own little zen garden (we won’t talk about the knife in it ?).

Scraping off paint
Scraping off paint

After all the paint is off, the rest of the project goes really fast!  Use glass cleaner to clean the backs of the coasters and let dry completely.  I got a bit excited with the next part and forgot to take pictures of every step.  I splashed some vinegar onto the coasters (the same side the paint was on to hide imperfections).  For this, I took a water bottle with a squirt top and filled it with vinegar.  I drizzled it over the coasters and the vinegar made pools on the coasters.  Then I quickly used the spray paint and sprayed over the vinegar puddles.

Spray paint over vinegar puddles

After letting it dry for a minute or so, I used a paper towel to blot the paint and absorb the vinegar puddles.  I let it dry a for a few more minutes and repeated the process again.  After that dried, I spray painted it without the vinegar and then blotted that with one of the damp paper towels to pick up smaller specks of paint.

Once they are fully dry and look perfectly imperfect (as mercury glass should), add the vinyl bumpers to the same side that was painted.

Vinyl bumpers
I found these at our local hardware store
Back of finished coasters
The backs are finished!

I then flipped them over, cleaned the tops with glass cleaner, and then poured a glass of wine.  The next morning I tested them with coffee – my Tiffany mug looks cute on them, no?
wine and coasters

Coffee and coasters


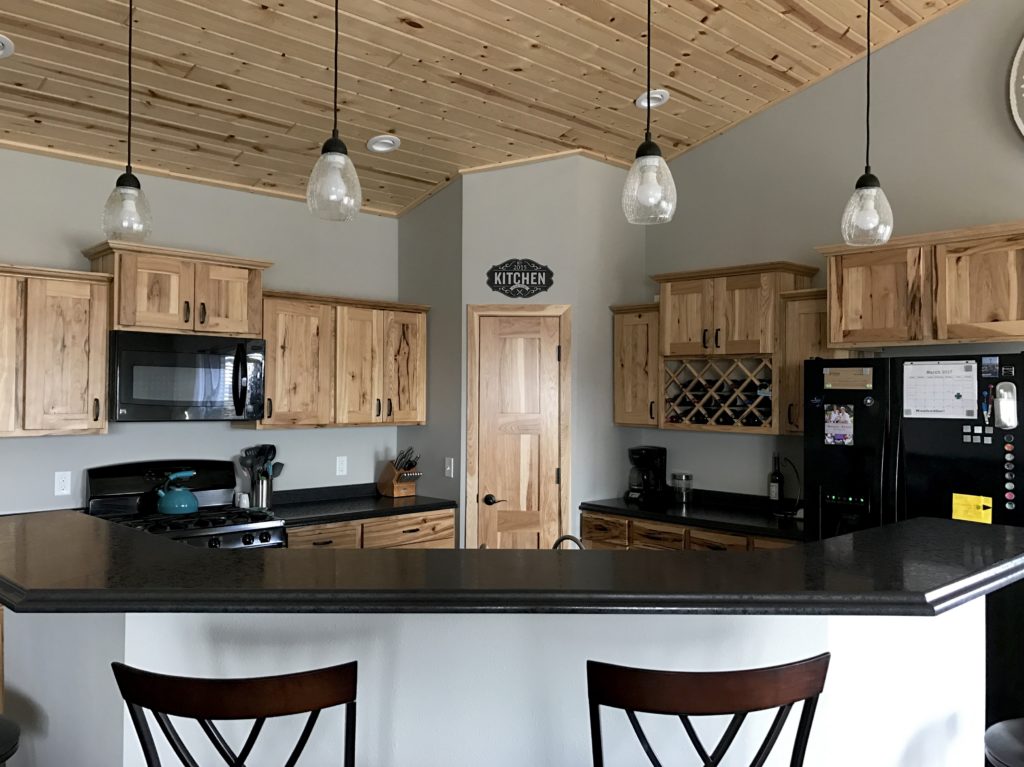
Our Hickory Kitchen

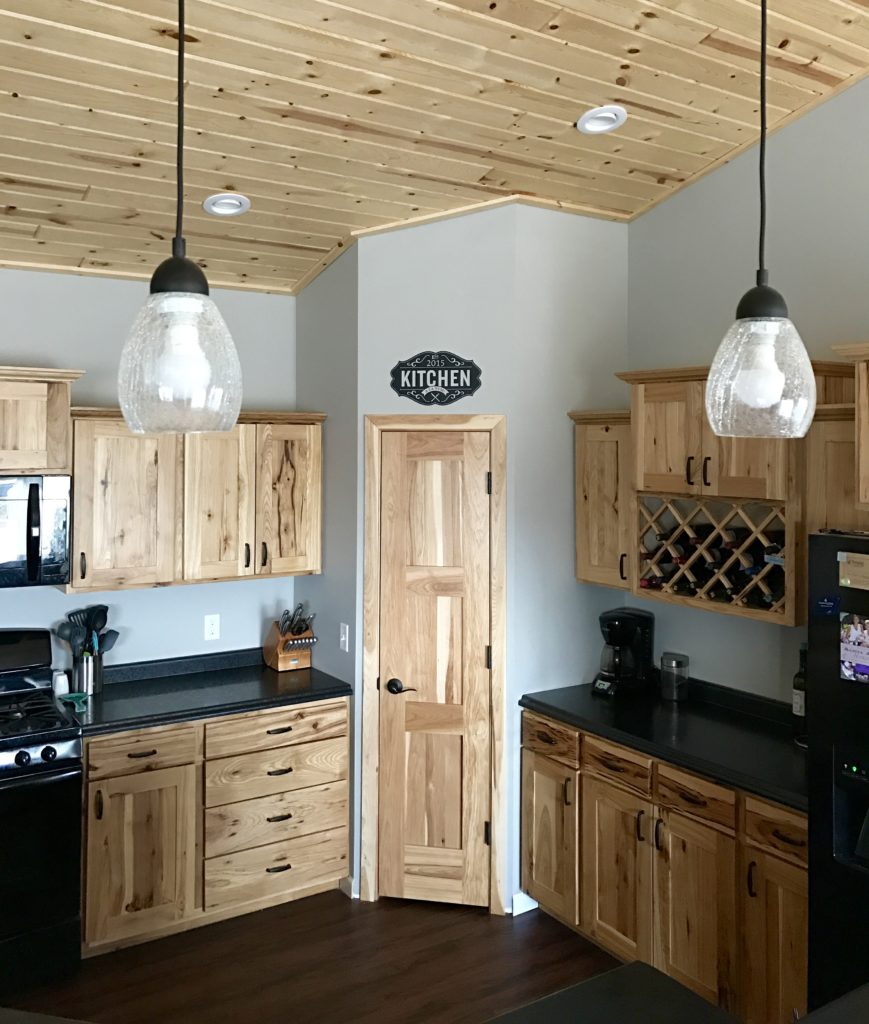
I’m not sure how we landed on the idea to have hickory cabinets in our kitchen.  Perhaps it caught our eye during our many trips to Menards.  Or maybe Landon had the idea from a house he once visited.  I know for a fact it was not from Pinterest because I barely found ideas when I started searching for it.  Regardless, we went with hickory and every morning I fall a little more in love when I get my coffee.  ☕️ ❤️

kitchen from left


We had a local Amish build our cabinets and they turned out absolutely amazing!  (Can you believe he built all this with no power tools?!)  It took awhile before we got the pantry door though.  That came from another Amish door maker.  Neither are the same Amish we got our mantle from.  (I believe I mentioned we have a lot of Amish by us.)  After getting the door installed, it took a few more months to figure out the trim.  Did you know hickory trim is not easy to find?  Landon ended up splitting some boards (from the cabinet maker) and I think the simple flat trim mimics the missionary cabinet style quite nicely.  We still are working on trim for the baseboard – all in due time!

pantry close up

As a wedding gift, my aunt gave us a gift certificate to Upper Case Living.  It’s been hard narrowing down what to put on all these blank walls but when I saw this one, I knew it would be the perfect addition to our kitchen.  What I love most is the established date.  We built our house and got married in 2015.  So not only was our kitchen physically established then, you could say the heart of our home was too, or you know our little family we make with the two of us.  ?

Kitchen a la yum

I think having it in black really pops against the hickory.   It was so easy to install too.  I didn’t have enough hands to take pictures but it’s mostly just rubbing the vinyl onto the wall and peeling back the paper that it came on.  Funny enough, the cutouts included everything but an established date.  I picked a font and size and ordered “2015” separately.  Matched the paint color from my walls pretty well, huh?  I was only a little nervous about that!

Pantry with lights


Most Magnificent Mantle

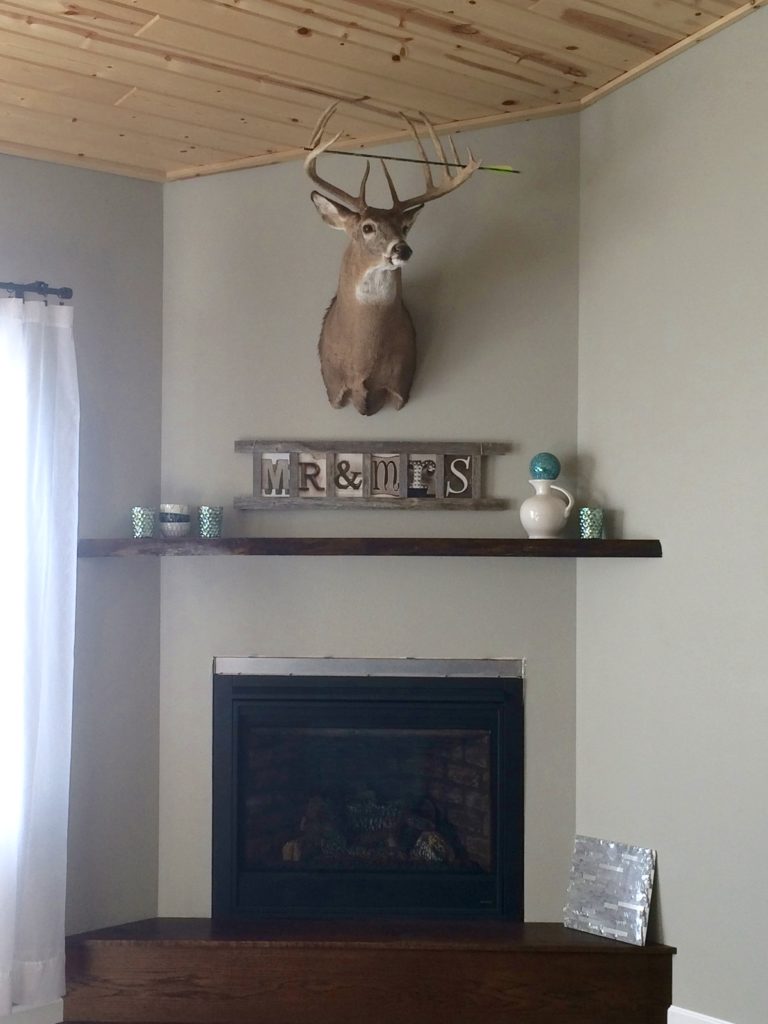
It seems like it took a lifetime to get our mantle made and installed.  It was totally worth the wait in my opinion.  Before our house even had studs for walls, I saw a picture of this kitchen with a raw wood countertop for a bar.  Raw edges, wood grain, oh my beauty!  I had to have it for our mantle!

A local Amish man built our kitchen cabinets and he had another Amish friend who could help us find a log for our mantle.  This lovely chunk of walnut sat out for ages to dry, all the bark had to be picked off by hand, and after some light sanding it was finally ready for a little clear coat.

I absolutely love that it’s not straight across.  The knot is visible when sitting in my chair and creates such a unique shape.  It’s perfectly imperfect, raw, natural, and I am in love. ?

It’s actually been difficult to decorate – I have so many ideas but terribly expensive taste in vases apparently.  Who knew?  I didn’t really care for vases until the last month or so.  The Mr. & Mrs. sign was a wedding gift and I think the rustic-look fits perfectly between the mantle and my husband’s deer (he calls him Billy – Bobby is hanging in an opposing corner ?).  I am obsessed with white porcelain right now and had gotten this hand-me-down Fiesta Ware pitcher from my mother-in-law and stuck it up there one day (and it seem like it will come down anytime soon).  The sphere on top of it is from Hobby Lobby.  I bought 5 for a bowl on our sofa table but only 3 fit so I had extra to add a little teal up there.  The three little bowls are stacked.  They are from Target and were a shower gift from some co-workers.  I thought stacking them gave an interesting look and a little height.  Lastly, the mercury glass candle holders are the newest addition that I feel helped make things seem a little more complete (I am not actually done decorating this in the slightest).  Our local hardware store has a gift shop and they have EVERYTHING on sale for 50% off right now in preparation for some remodeling.  We picked up the 3 for a total of $15 last weekend.  Not too shabby!

The whole fireplace isn’t finished but it has definitely made a huge improvement and feels more like a home with the mantle.  The tile on the step is what we plan to put around the fireplace up to the mantle.  It will also cover up that aluminum looking strip right above the unit.  To be honest, I don’t even notice those imperfections any more because it’s so nice looking above!  I can’t wait to continue to decorate it, especially seasonally.  We’ve celebrated two Christmas’s in this house, believe me when I say I have ideas waiting to execute!

The Most Amazing Chair Ever…& New Curtain Rods

I am so excited about this post and it feels like it has taken forever to share because I have not been home at the right time for decent lighting to take pictures.  I love sunny winter days but they really hurt taking clear pictures in rooms that face south.  Never mind that now, I was able to figure out some creative lighting techniques after work and now have pictures!  Without further ado, here is my post:

It all started when we rearranged our sectional in the living room to make room for our Christmas tree.  It turned out we would have a lot of floor space after the tree came down if we left the couch where it was.  My husband has always wanted a recliner and I have always wanted a fashionable chair.  A trendy push back was the perfect solution!  Set with a budget in mind, we went wandering into a furniture store on New Year’s Eve.  I never expected to find the perfect chair at the first store (and it was on sale for $200 less than I budgeted for!) but we did and ordered it the same day.  Last week we got the call that it finally was in and ready for pick up!

Saturday, Landon and I had back-to-back eye appointments (gotta keep those peepers healthy! ?) and we decided to take an early Valentine’s lunch afterwards ❤️.  It worked out perfectly that we would already be in the city the chair was in and could pick it up after our little date!

The comfiest chair ever.
Getting the chair also gave us the push we needed to finish the curtain rods we were making for our big living room window.  We have blinds so the curtains were not needed for privacy or blocking light.  I just felt the window needed to be framed out.  We took a dowel rod, painted it black, and cut it into two 18 inch rods.  So easy but we seemed to take a three month break between each step! ?

Short curtain rods (and the chair)
And there you have it.  The newest addition to our house!  (And yes, I did write this post reclined in aforementioned comfy chair and periodically taking breaks to gaze out our nicely framed window. ?)